Monday, April 2, 2012

Ideas Welcome, Inspiration on Backorder...

Lately there hasn't been much going on in my kitchen.  I haven't been all that busy, I really have no excuses.  One thing I will say is that I haven't made anything truly inspired lately.  I know with the warmer weather I want to be outside more but food has always been a welcome end no matter how hectic the day has been.


Kitchititipi, Upper Peninsula, MI.  (A pretty picture to distract me from not knowing what to cook. :P)

Lately, food and I have been at odds.

I've more or less run out of ideas that really drive me into the kitchen with an urge to create and be creative.  I lack motivation to make things I've already made and lately we've eaten a lot of bagels (home- baked of course).  I'm in some kind of weird cooking rut and all attempts to get out on my own have seen only very temporary success.  I think it's time for reinforcements.

Thats where you, my faithful readers, come in.

I want you to share all your ideas with me, no matter how crazy they are! What is something that you want converted to be vegan? What do you crave lately?

No matter how crazy the flavor combinations I will consider even the oddest suggestions.  After all I did recently make Jalapeno- Pineapple bagels with a crunch chili pepper crust.

What do you want to see here? What should I make? What have you made recently? Share!

Tuesday, February 21, 2012

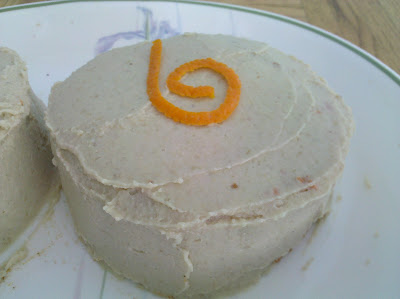
Raspberry Mousse Bars


I was so excited about it being my birth month that I have told every one, and I say it out loud at least ten times a day in my own home, which definitely tried the patience of my ever so patient Dan.  Honestly, how does he put up with me?  Maybe it's the desserts!

This recipe is a quick one and allows for a lot of variation.  Don't feel like you have to use the exact ingredients I use, these bars would be delicious with many kinds of berries and with a variety of nut crusts.  Get creative! Or just follow what I've written down, there's no shame in following something tried and true!

I have no idea what I'll do for my birthday on Saturday but it will definitely involve lots of delicious food, wonderful company, and great fun!


Raspberry Mousse Bars (makes one 9x9 or 8x11)
Crust:
2 C. Mixed nuts of your choice (I used pumpkin seeds, macadamia nuts, and almonds, all raw but you can roast them if you like)
2.5 T. Coconut Oil, melted
2-3 T. Palm Sugar
2 T. Flax meal (or substitute sesame seeds if you like them)

Raspberry Layer:
12 oz. package Berry Medley, thawed (Strawberries, Raspberries, Blueberries)
2 T. Dried Cherries
1/4-1/2 lb Firm Tofu (depends on how creamy you want it)
1 t. Vanilla
2-4 T. Palm Sugar (to taste)
2 T. Vegan Mayonaise
Dash Salt
2 T. Agar Agar Flakes (heaping)

Grease a 9x9 or 8x11 baking dish (or whatever dish you are using) and line with parchment paper.  Grease the top of the parchment paper a little too.


Crust:
1. Put everything in a food processor and process until it all sticks together and it a medium-coarse meal.
2. Press into your dish of choice firmly with your fingers.  Sprinkle with a little salt if you like (optional).


Raspberry Layer:
1. Put all ingredients in a high speed blender and blend thoroughly, very thoroughly.  You want all the seeds from the berries to be chopped up.  Scrape down the sides of the blender and run it a few times on high.
2. Transfer the mixture to a small saucepan and simmer for 5-10 minutes to allow the agar agar to dissolve. Stir often so it doesn't burn to the bottom.
3. Remove from heat and pour over the crust mixture.  Allow to cool slightly before putting it in the fridge to set.


Notes:This dessert is quick to make and can be made ahead.  It can also be frozen in single servings and eaten frozen or thawed. If you can't wait for this to set, or yours doesn't set for some reason I find that this is heavenly over vanilla ice cream! Keep covered in the fridge to keep it firm.  I don't expect this dessert to last long!

Thursday, February 2, 2012

Pumpkin Cinnamon Rolls


Happy Groundhog Day!

So because it is my birth month I've decided to indulge myself a bit during the next 30 days.  I decided to start with these magnificent cinnamon rolls! As cliche as it is to say this, it's true that you can't eat just one! I put pumpkin not only in the bread part but in the filling as well to give it a nice velvety texture and sneak in some extra vitamins. So I guess you could argue that these are healthy? Maybe? No? I'm going to pretend they are anyway.

Now this recipe uses the baguette recipe with some modifications.  You can always halve this or you can freeze extra rolls either before or after baking to save them for later.  This is not a "super easy" recipe, it does take a little bit of time, but its well worth it!  These do not need a glaze but if you would like one you could always add that on top after they've baked.

These cinnamon rolls have a distinctive pumpkin and cinnamon flavor, and are moist and delicious.  The bread part is a little more firm so these stay together better while you are eating them.  Don't be shy with the filling! It's really what makes these rolls great!


Pumpkin Cinnamon Rolls ( Makes about 22 Rolls)
Bread:
2.5 C. Bread Flour (plus extra for rolling out the dough)
1 t. Fine Salt
1/4-1/3 Honey (or other liquid sweetener, to taste)
1/4 C. Warm Water
3 T. Maple Syrup
2 1/4 t. Yeast (1 package)
1 C Pumpkin Puree
1/2 t. Ground Cinnamon
1/2 t. Pumpkin Pie Spice

Filling:
1.5 C. Walnuts
1.5 C. Pecans
1/2 C. Pumpkin Puree
1/2 C. Palm Sugar (or brown sugar)
1/3- 1/2 C.  Honey (or other liquid sweetener, to taste)
1/3 C. Maple Syrup
2-3 T. Ground Cinnamon (generous)
1/4 t. Ground Nutmeg (optional)
2 T. Vegan Butter
1/2 t. Fine Salt
9 dates, diced into pea sized pieces
Pinch of Ground Cloves and Ginger

1. Preheat oven to 375 F. Proof the yeast in the warm water.  Mix all other ingredients, plus the yeast mixture in a mixing bowl. Cover with plastic wrap and allow to rise for 1 hour. It won't rise much and that's ok.
2. Put pecans and walnuts in a food processor and pulse until they are a coarse meal. Some larger pieces are ok.  Add nuts and all other ingredients together and mix thoroughly.
3. Divide the dough in two pieces. Roll on a floured surface into rectangles about 10"x14" (less if you want a thicker, more dense bread). 
4. Spread half of the filling on the dough and roll it fairly tightly into a log. Take a sharp knife and cut the log into sections. How many is up to you but I did between 8 and 10 per log depending on how tall I wanted the rolls to be. Mine were about 1.5" or so tall. Repeat for the second log.
5. Place finished rolls on a baking sheet or in a 9" cake pan (non stick or greased) and bake for 20-25 minutes.

Notes: These keep for several days and you can always make them ahead.  I have never frozen them but I imagine that would also work.

Wednesday, February 1, 2012

Happy February!- Triple Chocolate Truffle Torte

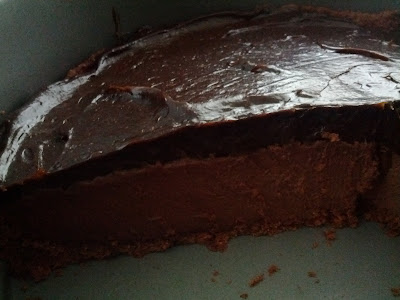
Tried to get a picture before it was completely eaten!

For a while now I have claimed the whole month of February as fair game for celebrating my birthday. Even though my actual birthday isn't until later in the month I find ways to celebrate all throughout February.  It's also rather convenient that with Valentines day also being in February there is plenty of chocolate for me...yum.

Dan and I don't celebrate Valentines day because we celebrate how much we love each other many times a year; whether it's a special dinner, a "date night," or just snuggling up to watch a movie. I get to be playfully demanding during my birth month and frequently use it as an excuse for slightly indulgent behavior. :P Dan is a very patient and understanding man, and he humors me the whole way.  How lucky an I?

Getting on to the deliciousness, you really should try this torte. It doesn't take a whole lot of effort, the ingredients are easy to find, and it is very rich and satisfying. If you are looking for a dessert that deserves the label "death by chocolate," look no further!

Triple Chocolate Truffle Torte  (Serves 12)
Crust:
1 C. Whole wheat flour
1/2 C. Vegan Butter or Vegan Shortening
1/2 t. Salt
1 T. White Vinegar
1t. Baking Powder
2 T. Cocoa powder
2 T. Agave (optional)

First Layer: (Mousse Layer)
1 pound Firm Tofu
10 ounces semisweet chocolate chips (or dark chocolate if you prefer)
1 t. Vanilla Extract
3 T. Maple Syrup

Second Layer:  (Ganache Layer)
3-4 Medium Avacadoes
2-4 T. Cocoa Powder
1 t. Vanilla Extract
1 t. Ground Cinnamon
1/4 C. Palm Sugar (or other granulated sweetener)
3 T. Water
Agave (to taste)


Make the Crust:
1. Preheat oven to 350 F. Mix all ingredients with your hands in a bowl until well combined.  Press crust into a greased or non stick spring form pan. Allow some crust to reach up the sides about 1 inch or so.
2. Bake for 15 minutes, remove from oven and allow to cool.

First Layer:
1. In a small sauce pan melt the chocolate chips (you can also use a microwave if you want to) over low heat stirring frequently so they do not burn. Once completely melted remove from heat, add maple syrup and vanilla and mix well.
2. In a blender place the tofu and the chocolate mixture and blend until very very smooth. Use a spatula to scrape down the sides and check for any remaining lumps of tofu.
3. Pour on top of (mostly) cool crust and spread it out so it's even. Place in fridge to cool while you prepare the Ganache Layer.

Second Layer:
1. Put all ingredients in blender and blend until very smooth. You may have to scrape down the sides with a spatula a few times but it's worth it! Keep in mind that granulated sweeteners may need additional time to dissolve so give the mixture an extra minute or two to set before the final tasting  to decide on the sweetness.
2. Pour and spread the second layer over the first.  Chill for 30 minutes before serving for best results.

Notes: There isn't much to say here other than the directions make this seem like it's going to take longer than it will. I made this in about 30 minutes.  The nice thing about this is that it's rich enough that you can eat/serve smaller servings so hopefully it will stick around longer! You can also freeze this if you like more of an ice cream cake consistency or if you want to make it ahead of time.

Happy February!
A close up of the layers.

Wednesday, October 26, 2011

Lumbar Strain and Magic Cure

On Monday I had a terrible muscle spasm and somehow strained my lower back.  The pain was some of the most intense I've ever felt and was unrelenting.  Needless to say I didn't do much besides sit around, wishing I was in less pain so I could start getting my to-do list done.  Today after two days of ice, heat, ibuprofen, and feeble attempts at stretching I am starting to feel somewhat close to normal.  I did perhaps over exert myself today, as my sore back is now reminding me, but I am determined to keep going with Vegan Mofo as soon as I can stand without being in pain.

Until then let me leave you with this one awesome technique that I've used for injuries.  When done properly it works wonders for pulled muscles and other injuries involving swelling.  As always consult your doctor before trying this, etc.

Magic Cure

1. Apply a cold compress to area for 20 minutes.

2. Immediately after removing the cold compress submerge area in very warm water (think warm like a hot tub).

3. Leave the area submerged for 20 minutes.  Gently remove from the warm water.  Relax.

I use this for my back all the time and it really works quickly.  You may have to do this a few times a day if your swelling is really bad.  Use common sense of course, be careful, and don't be afraid to ask your doctor if this is right for you.  (ok enough of the spiel)

Time for a gallery of interesting photos:

Raw Nut Pate Wraps

Our Vibrams on a Summer Hike

I collapsed after finishing the hike and realized the tree I was under was pretty.

Me feeding the goats during a trip to the zoo in the Upper Peninsula, MI
Well there are all the random photos that I have the energy to post.  Sorry there's not food recipes this time.  Tomorrow is German Feast or Oktoberfest with friends so I will make sure there are lots of recipes then!

Enjoy your hump day! I'll be doing my best to be up on my feet with a healed back by tomorrow!

Friday, October 21, 2011

Baguettes


I've been making this recipe for quite a while now.  Thanks to the lovely chica that writes Sugarlaws I found this wonderful and easy recipe for delicious, fluffy, and crusty baguettes.  Because in all seriousness, what is more sensual than the smell of fresh baked bread?


Baguettes (Adapted from Sugarlaws, Yields two loaves)
2 1/2 C. Bread or all purpose flour
1 C. Warm water
1 Package of yeast (11 grams)
1 T. Vegan Sweetener (I used honey, but others will do)
1 t. Salt

1. Preheat oven to 375 degrees.

2. Dissolve yeast in sweetener and water. Let sit for 10 minutes or until foamy. (This is called proofing the yeast)

3. Mix flour and salt. Add water mixture to the flour and knead until blended.

4. Place the dough in a greased bowl, coating all sides of dough. Cover bowl with saran wrap, and let rise somewhere warm for 60 minutes, or until dough has doubled in size.

5. Punch down dough. On a lightly floured surface, roll dough flat into a 12″x18″ rectangle. Cut dough in half to form two 12″x9″ rectangles. Roll up each half of dough tightly, creating a 12″ log. 6. Place each roll 3 inches apart on a greased cookie sheet. Make deep diagonal slashes across loaves every 2 inches. Cover with saran wrap, and let rise in a warm place for 45 to 60 minutes, or until doubled again.

7. Bake for 20 to 25 minutes, or until tops of loaves are just starting to brown.

Baguettes rising before being baked.

Notes: I never get too crazy about step 5.  I just roll it out enough that I can roll it up and it comes out fine. If you want a thicker, and more crusty loaf put a small dish of water in the oven when you put the bread in to bake. This rarely makes it more than two days in my house but once the bread cools completely you can put in into an air tight container to store it.  If you have leftovers that have gone stale you can always make bread crumbs!  Enjoy!


Wednesday, October 19, 2011

Salsa Verde


 Last night for dinner I ate bread and (vegan) butter with cinnamon.  Not much of a dinner right? Today I hope to make up for that by making whatever strikes my fancy once dinner rolls around but first lets talk salsa.

Since it's vegan MOFO I've been trying to think of a theme but, honestly, my life is too chaotic for anything to stick so I guess the theme could be "impulse cooking." I try to have some kind of special theme dinner once a week and invite some friends and family over to relax and enjoy.  This week was the Indian Feast, next week I think might be Taco night, so in preparation I'm making some delicious Salsa Verde.


Salsa Verde
3.5 pounds Tomatilos, husked and rinsed
5 cloves of garlic, peeled
1 white onion, cut in 1 inch cubes
1 C. Cilantro, packed
2/3 C. Lime Juice
1 T. Salt

1. Preheat oven to 500 degrees.
2. Spread out tomatilos, garlic, and onion on a cookie sheet.  Roast for 20-35 minutes.
3. In smaller batched blend roasted veggies with the cilantro, lime juice, and salt.
3. Fill canning jars, leaving 1/2" of headspace, finger tighten the lids.  Waterbath can for 15 mins, allow to sit in the water for 5 minutes (with the stove burner off) remove from the water and allow to cool.


Notes: If you want to enjoy this salsa right away or within 5-7 days there is no need to can it, just refrigerate in an air tight container.  It will be very lime flavored in the beginning but will mellow out over time.  Goes great on enchiladas, nachos, or just as a dip for chips.  Enjoy!

Tuesday, October 18, 2011

Apple Raspberry Bread


Every once in awhile I get something stuck in my head that I just have to make. This bread is one of those things.  I thought about it over and over, compiling what ingredients I would use. When I actually got around to going in the kitchen and making it I of course did it completely different that what I intended.  But it came out so good!  This bread is moist with a slight spiced apple flavor, and wonderful pockets of intense raspberry flavor.  I use raspberries that I picked and froze on a cookie sheet so the raspberries are not stuck together but I think ones from the store would work.


Apple- Raspberry Bread
2 C. Flour
1/2 C. Coconut Milk
1 1/2 C. Apple Pure (about 4 small apples)
1 t. Baking Soda
3/4 C. Honey (or other sweetener)
1/4 C. Agave (or maple syrup)
1 T. Ground Cinnamon
2 T. Flax Meal
1/2 t. Salt
1 C. Frozen Raspberries

1. In a mixing bowl combine all ingredients except raspberries until combined.  Fold in raspberries.

2. Bake for one hour at 350 F in a greased loaf pan.  The bread is done when a toothpick comes out clean.  You might need to add 5-15 minutes depending on your oven.

3. Allow to cool before serving.  Enjoy!


I usually store this bread at room temp in an air tight container.  I have no idea how long it will last that way though because each time I've made this it's only lasted 2-3 days.  Obviously storing it in the fridge would help to preserve its freshness but it's not required.  I eat this bread plain, no need to any butter or spreads!

Saturday, October 15, 2011

Raw Food Love

So back during the time that Dan and I were raw I asked him to make dinner for me once a month since our options for eating out were so very limited.  I just wanted one meal each month that I didn't have to make and preferably was a surprise.  Dan of course did an amazing job each time, and even surprised me.  He didn't pick all simple things either, he really went all out.

Typical Snack
I absolutely loved it when he made me surprise foods.  It didn't matter what he made or even if it tasted good.  The only thing I cared about was that Dan cared enough about me being happy to make me food (and put up with my craziness).

Raw Pizza

Blueberry Cheesecake
So if you're ever trying to stick to a diet, don't be afraid to ask someone to cook you something that adheres to that diet every once in awhile.  It made all the difference for me, and I'm sure Dan got something out of it too :P
Raw Carrot Cake
So when your significant other (or friend) is having a hard time/week/month/year. Don't be afraid to show come home cooked (or uncooked) love! You'd be surprised what a difference one meal can make! Oh, and a little red wine doesn't hurt either!

Wednesday, October 12, 2011

Indian Feast! (Recipe Round-up)

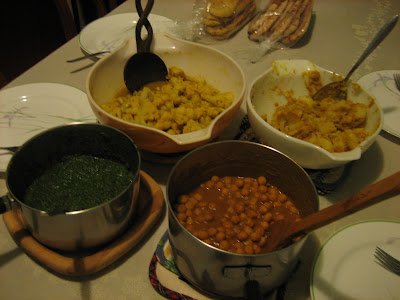
The whole spread!
I've been meaning to post my Indian food recipes for awhile but last night the opportunity presented itself.  I feel that to really appreciate a food blog you need pictures. Everyone loves a little food porn right? Well, last night some family came over and I made a great Indian feast. 

Happy Vegan MOFO!


Palak (Pureed Spinach dish)
24 ounce bag young spinach leaves, washed
3 cloves of garlic, minced
2 T. Nutritional Yeast
Salt and Pepper to taste
1 t. Garam Masala
1/2- 1 t. Curry (adjust for how spicy you want it, I use hot curry)

1. In a medium stock pot saute garlic in a little olive oil until slightly golden brown. 
2. Add spinach to stock pot and heat until the spinach is thoroughly wilted, stir often.
3. When its all wilty put it in a blender and puree until its as smooth as you want it.  I personally like mine pretty smooth.
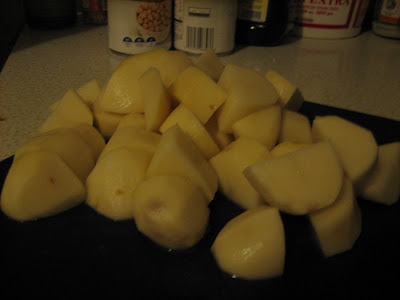
Potatoes before being boiled


Curried Coconut Potatoes
5-6 medium sized potatoes, peeled and cut in chunks
1/2- 3/4 of a can of coconut  milk (depends on how much sauce you want)
1 t. Curry powder
1 t. Garam Masala
1 t. Tumeric Powder
1/2 t. Garlic Powder (optional)
Salt and Pepper to taste

1. Boil potatoes until cooked through.  Drain and set aside.
2. In a separate bowl whisk together the other ingredients.  Add the potatoes and mix to combine.
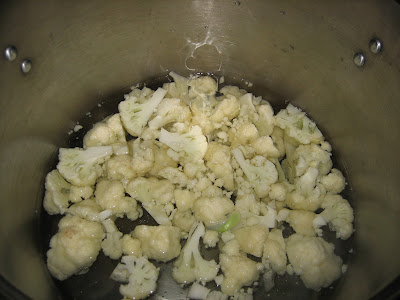
Boiling the cauliflower

 
Baked Curry Cauliflower
1 head of cauliflower, cut into bite size pieces
3/4 C. Frozen Peas (optional), thawed
1/2-1 Can of coconut milk
1.5 t. Garam Masala
1 t. Hot Curry (more if you like it extra spicy)
1 t. Dill
1/2 t. Chili Powder
1/2 t. Garlic Powder
1 T. Tumeric Powder (you can add more if you want a more vibrant yellow color)
2 T. Arrowroot Powder
Salt and Pepper to taste

1.Boil cauliflower until tender. 
2.In a separate bowl whisk together sauce ingredients. If you want a thick sauce transfer to a sauce pan and heat until reduced, stirring occassionally.
3. Combine the cauliflower and the sauce with the peas.  If its not hot enough I put it in the oven at 200 degrees until the peas are heated through.

Finished Curry Cauliflower


Pumpkin Chickpea Masala (Chana Masala)
3 (15 oz) Cans Chickpeas, drained and rinsed
1/2 C. Pumpkin ( I was a little generous)
4 T. Ketchup (again, be generous)
2 t. Garam Masala
1 t. Hot Curry (I like it spicy)
1/2 t. Chili Powder (optional)
1/2 a Can of coconut milk (3/4- 1 cup approx.)
Salt and Pepper to taste

1. In a medium saucepan whisk the sauce ingredients together. Simmer for a few minutes.
2. Add the chickpeas.  Simmer for 5-10 minutes more or until the sauce thickens slightly.

Yum!
It didn't take me long to make all of these dishes and they all go great with naan.  This fed five of us with enough for a lunch the next day and several of us had seconds too.  This meal also pairs wonderfully with red wine! I like to cook these dishes when I'm entertaining because the food is new and fun and everyone can mix and match what they like.  Works great for a family dinner!